

 NEWS
COMMUNITY
NEWS
COMMUNITY
 STORE
STORE
 TUTORIALS
 GODOT
GODOT TUTORIALS
GODOT
GODOT TUTORIALS
 SIGN UP
LOGIN
SIGN UP
LOGIN
 LOGOUT
 ROKOJORI
 NEWSLETTER
SIGN UP
LOGIN
LOGOUT
NEWS
COMMUNITY
STORE
TUTORIALS
GODOT
GODOT TUTORIALS
NEWSLETTER
SIGN UP
LOGIN
LOGOUT
NEWS
COMMUNITY
STORE
TUTORIALS
GODOT
GODOT TUTORIALS
 TOGGLE FULLSCREEN
VOLLBILD AN/AUS
Post Processing
TOGGLE FULLSCREEN
VOLLBILD AN/AUS
Post Processing
Effects & Filters
Effects & Filters
::/_graphics/labs/godot/screen-shots/godot-post-processing-screen-shader.jpg
 LOADING VIDEO
LADE VIDEO
LOADING VIDEO
LADE VIDEO

![]() media-video video
media-image img
media-video video
media-image img
parent:media-gallery
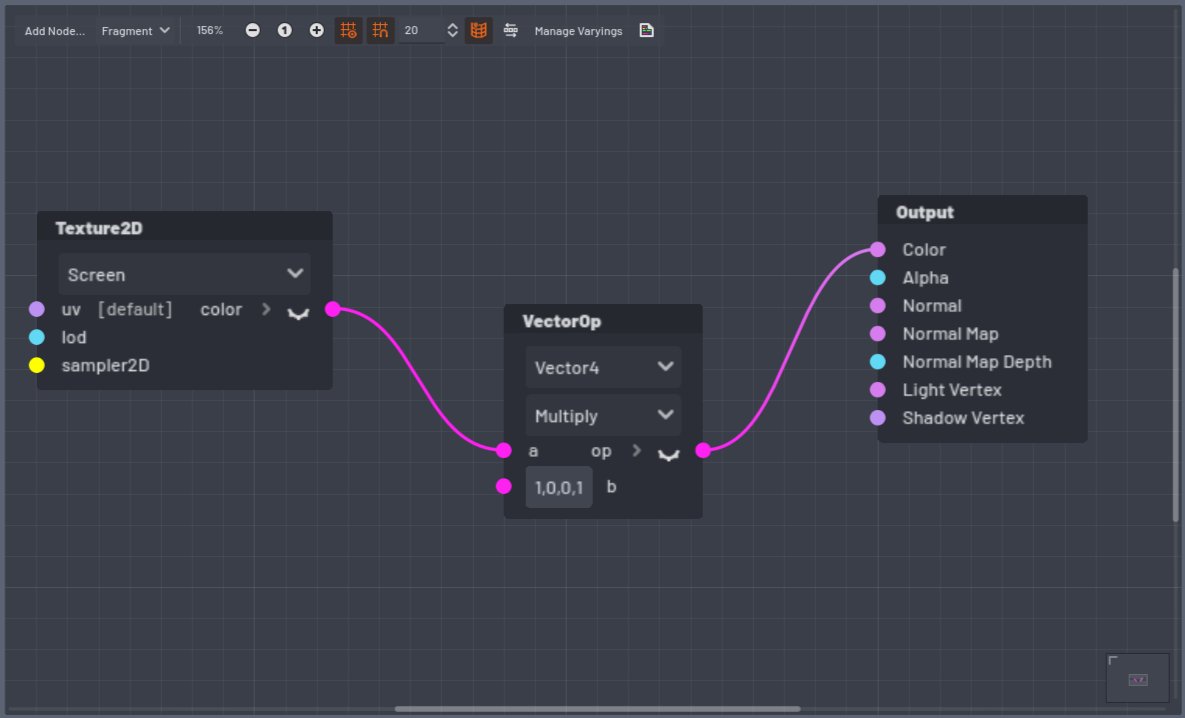
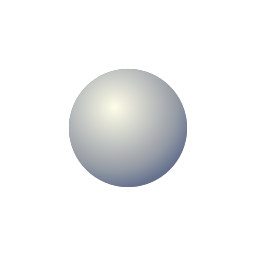
Custom Post Processing Shader
Custom Post Processing Shader
media-video video
media-image img
media-video video
media-image img
parent:media-gallery
Custom Post Processing Shader
Custom Post Processing Shader
 QUICK TUTORIAL FOR RED TINT
1. Add a ColorRect
QUICK TUTORIAL FOR RED TINT
1. Add a ColorRect
2. Set "Control > Layout > Anchors Preset" to "Full Rect"
3. Create a Shader or VisualShader with Mode "Canvas Item"
4. Create a ShaderMaterial, assign the shader
5a. For a VisualShader: Use the graph from the image
5b. For a Shader: Use this code
shader_type canvas_item;
uniform sampler2D screenTexture:
hint_screen_texture,
repeat_disable,
filter_linear_mipmap;
void fragment()
{
vec4 redTint = vec4( 1, 0, 0, 1 );
COLOR = texture( screenTexture, UV ) * redTint;
}
6. Run a test, since it won't be visible in the editor.
LOADING VIDEO
LADE VIDEO
![]() media-video video
media-image img
media-video video
media-image img
parent:media-gallery
Custom Post Processing Shader
Custom Post Processing Shader
QUICK TUTORIAL FOR RED TINT
1. Add a ColorRect
media-video video
media-image img
media-video video
media-image img
parent:media-gallery
Custom Post Processing Shader
Custom Post Processing Shader
QUICK TUTORIAL FOR RED TINT
1. Add a ColorRect
2. Set "Control > Layout > Anchors Preset" to "Full Rect"
3. Create a Shader or VisualShader with Mode "Canvas Item"
4. Create a ShaderMaterial, assign the shader
5a. For a VisualShader: Use the graph from the image
5b. For a Shader: Use this code
shader_type canvas_item;
uniform sampler2D screenTexture:
hint_screen_texture,
repeat_disable,
filter_linear_mipmap;
void fragment()
{
vec4 redTint = vec4( 1, 0, 0, 1 );
COLOR = texture( screenTexture, UV ) * redTint;
}
6. Run a test, since it won't be visible in the editor.
https://i.ytimg.com/vi_webp/Ab9uXIeoKUU/maxresdefault.webp
 LOADING VIDEO
LADE VIDEO
LOADING VIDEO
LADE VIDEO
![]() media-video video
media-image img
media-video video
media-image img
parent:media-gallery
Godot Built In Post Processing
Godot Built In Post Processing
media-video video
media-image img
media-video video
media-image img
parent:media-gallery
Godot Built In Post Processing
Godot Built In Post Processing
 17:56
17:56
 Play on YouTube
GDQuest YouTube Channel
GDQuest Website
Explains the WorldEnvironment node:
Play on YouTube
GDQuest YouTube Channel
GDQuest Website
Explains the WorldEnvironment node:
- Ambient Occlusion (SSAO)
- Screen Space Reflection (SS)
- Depth of Field (DOF)
- Bloom/Glow
- Adjustments (Contrast/Brigthness/Saturation/Color Correction)
LOADING VIDEO
LADE VIDEO
![]() media-video video
media-image img
media-video video
media-image img
parent:media-gallery
Godot Built In Post Processing
Godot Built In Post Processing
17:56
Play on YouTube
GDQuest YouTube Channel
GDQuest Website
Explains the WorldEnvironment node:
media-video video
media-image img
media-video video
media-image img
parent:media-gallery
Godot Built In Post Processing
Godot Built In Post Processing
17:56
Play on YouTube
GDQuest YouTube Channel
GDQuest Website
Explains the WorldEnvironment node:
- Ambient Occlusion (SSAO)
- Screen Space Reflection (SS)
- Depth of Field (DOF)
- Bloom/Glow
- Adjustments (Contrast/Brigthness/Saturation/Color Correction)
https://i.ytimg.com/vi_webp/oehdIc8NGXE/maxresdefault.webp
 LOADING VIDEO
LADE VIDEO
LOADING VIDEO
LADE VIDEO
![]() media-video video
media-image img
media-video video
media-image img
parent:media-gallery
SDFGI & SSIL
SDFGI & SSIL
7:16
Play on YouTube
GDQuest YouTube Channel
GDQuest Website
Short tutorial about how to use SDFGI and SSIL. Those effects use colored light which bounces to
illuminate the scene. It makes the scene look more glued together, since nearby objects
manipulate their neighbors.
LOADING VIDEO
LADE VIDEO
media-video video
media-image img
media-video video
media-image img
parent:media-gallery
SDFGI & SSIL
SDFGI & SSIL
7:16
Play on YouTube
GDQuest YouTube Channel
GDQuest Website
Short tutorial about how to use SDFGI and SSIL. Those effects use colored light which bounces to
illuminate the scene. It makes the scene look more glued together, since nearby objects
manipulate their neighbors.
LOADING VIDEO
LADE VIDEO
![]() media-video video
media-image img
media-video video
media-image img
parent:media-gallery
SDFGI & SSIL
SDFGI & SSIL
7:16
Play on YouTube
GDQuest YouTube Channel
GDQuest Website
Short tutorial about how to use SDFGI and SSIL. Those effects use colored light which bounces to
illuminate the scene. It makes the scene look more glued together, since nearby objects
manipulate their neighbors.
https://i.ytimg.com/vi/gqe0InyIk4U/maxresdefault.jpg
media-video video
media-image img
media-video video
media-image img
parent:media-gallery
SDFGI & SSIL
SDFGI & SSIL
7:16
Play on YouTube
GDQuest YouTube Channel
GDQuest Website
Short tutorial about how to use SDFGI and SSIL. Those effects use colored light which bounces to
illuminate the scene. It makes the scene look more glued together, since nearby objects
manipulate their neighbors.
https://i.ytimg.com/vi/gqe0InyIk4U/maxresdefault.jpg
 LOADING VIDEO
LADE VIDEO
LOADING VIDEO
LADE VIDEO
![]() media-video video
media-image img
media-video video
media-image img
parent:media-gallery
Post Processing with Depth/Normals
Post Processing with Depth/Normals
17:34
Play on YouTube
Lukky YouTube Channel
Lukky on Github
How to setup a custom 2D and 3D post processing in godot and create own custom shaders with the shader language.
The 3D post processing shader is applied after the opaque but before the transparent queue.
LOADING VIDEO
LADE VIDEO
media-video video
media-image img
media-video video
media-image img
parent:media-gallery
Post Processing with Depth/Normals
Post Processing with Depth/Normals
17:34
Play on YouTube
Lukky YouTube Channel
Lukky on Github
How to setup a custom 2D and 3D post processing in godot and create own custom shaders with the shader language.
The 3D post processing shader is applied after the opaque but before the transparent queue.
LOADING VIDEO
LADE VIDEO
![]() media-video video
media-image img
media-video video
media-image img
parent:media-gallery
Post Processing with Depth/Normals
Post Processing with Depth/Normals
17:34
Play on YouTube
Lukky YouTube Channel
Lukky on Github
How to setup a custom 2D and 3D post processing in godot and create own custom shaders with the shader language.
The 3D post processing shader is applied after the opaque but before the transparent queue.
TO GODOT TUTORIALS
media-video video
media-image img
media-video video
media-image img
parent:media-gallery
Post Processing with Depth/Normals
Post Processing with Depth/Normals
17:34
Play on YouTube
Lukky YouTube Channel
Lukky on Github
How to setup a custom 2D and 3D post processing in godot and create own custom shaders with the shader language.
The 3D post processing shader is applied after the opaque but before the transparent queue.
TO GODOT TUTORIALS

![]()

![]()

![]()

![]()

![]()

![]()

![]()

![]()

![]()

![]()

![]()

![]()
All social media brands are registrated trademarks and belong to their respective owners.
CONTACT
IMPRINT
TERMS OF USE
PRIVACY
© ROKOROJI ® 2021 rokojori.com
CONTACT
IMPRINT
TERMS OF USE
PRIVACY
© ROKOROJI ® 2021 rokojori.com
We are using cookies on this site. Read more...
Wir benutzen Cookies auf dieser Seite. Mehr lesen...